Showing posts with label spool of sunshine. Show all posts

Saturday, November 7, 2015

Kawaii socks

I have been collecting kawaii socks for a few months, and these are some of my favourites. Most of them were purchased from Korea( two of them were gifts from a friend who got them in K-town in Los Angeles)
 Rilakkuma!!^
 Blue stripes with teddy bears^
 Grey kitty socks!^


Happy crocheting and crafting!
~Anna

Saturday, October 3, 2015

DIY Where's Waldo Costume

Halloween is coming up. Here is a cheap and quick last-minute costume!


As a kid, I always loved the Where's Waldo books. Sometimes I would get frustrated at them because I could never find Waldo.:P
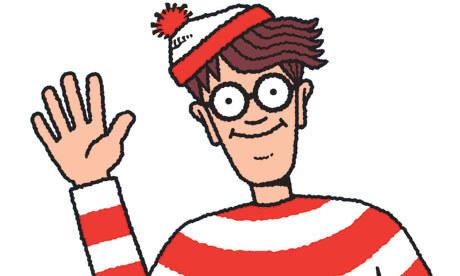
 (image found at google.com)


For Reformation Day, I wanted to be Waldo. I already had dark blue jeans, red and white striped t-shirt, brown shoes, and nerdy glasses. However, I did not have a red beanie. Since I did not want to buy a red beanie, I decided to make my own! I looked on Ravelry for some beanies but decided to make my own instead.

Using some red yarn from Red Heart, I began to make the hat:
I basically used the same pattern for my Easy Pom Pom Beanie which is from Lion Brand. Here's the link to the pattern!
I made a few adjustments and here is the new pattern I came up with:

Materials:
Red worsted weight yarn
6.00 mm crochet hook
Plastic needle

Beanie:
Ch 42
Row1: In the 3rd ch away from the hook, hdc. Hdc in every st across.
Row2- desired length: Ch2, turn, hdc in the BACK LOOPS ONLY in every st across.

BO with long tail for sewing.

Once you have your rectangle, fold it in half (Fold it so that the ribbed texture is vertical instead of horizontal)and sew the side opposite to the folded side to create a tube.


With a long strand of yarn of the same colour, thread around the top of the tube and pull tightly. If there is still a hole at the top, sew it together until the hole is closed.

Beanie done!

The beanie was quite long, so I folded the bottom up. I really like this beanie because I can either keep the bottom unfolded for the beanie to be slouchy, or I could fold it up to make it more like a standard beanie.

Here is a super easy and quick way to make a pom pom with just your hands!!
Wrap red yarn around your hand till it is super thick, tie a string in the center, and cut through the two loops.

After making the pom pom, I sewed it to the hat. Finished beanie:


Here are the other things you will need for the costume:
1. Red and white striped top
2. Dark blue jeans
3. Glasses
4. Brown/ Beige shoes


Tada! I am Waldo!


Have fun crafting and crocheting!
~Anna

This pattern is an original pattern by Anna S. from Spool of Sunshine(October 2015). Please do not claim this pattern as your own. If you wish to share this pattern, you may link to this pattern but please do not reprint it on your site. You may keep a copy for your own personal use but you may not sell or distribute it, or sell items made from this pattern.

Saturday, July 25, 2015

Amigurumi Light from Death Note

I was a big fan of Death Note. I used to read the manga/comics at the library when I was younger. The plot and characters blew my mind. :)


My favourite character in the manga was L who is a detective.(image found at google.com)
Since L is my favourite, I wanted to crochet an amigurumi version of him, but his hair was too spikey and complicated for me to crochet, so I decided to crochet Light who had much easier hair to crochet. :) (image found at google.com)
Before making Light, I sketched him out on a piece of paper:
This was my first sketch of both Light and L, but I changed, Light's sinister look to a cuter look instead:

I used tan, white,blue,brown, and red yarn, and my 3.75mm crochet hook to make Light


I started off by making the head:

Then, I attached the eyes

And since I am lazy, I did not want to make Light's head and body separate then sew them together, I crocheted  both the head and body as one big piece.


Next, I made Light's limbs and then sewed them to the body:


Next came the hardest part: the hair. It took me an hour and half to embroider the hair to Light's head, but it was worth it:

With the help of my dad, I made Light's signature red neck tie, and my dad tied it on for me since I do not know how to tie a neck tie. :P

The final step was to make Light's Death Note. First, I cut a rectangle shaped piece of cardboard, then painted it black and wrote "Death Note" on it with white paint:

Then finally, I used a glue gun to glue it to Light's hand: 


Light is complete!! 


I hope you liked this post! :) It has been a very very long time since I posted something on this blog. I hope to post more soon! Maybe I will make L and post him later! :) 

Till next time, Happy Crocheting! 

~Anna

Sunday, May 25, 2014

All Things Must Come To An End

I don't know why, but I thought that the title for this post was dramatically funny. :) But anyways, yeah... I don't know where to start... Uh, so, several years have past by since I began this blog, and guess what? I am going to high school this fall. So, high school means more homework and less time to blog. :) You all probably know by now, that I have very little time( I post about once a month now). So, I think with high school coming up this year, that leaves me absolutely no time to blog. I am very sad. :'( Hopefully, I will post once in a while whenever I have a little bit of time. So, I am going to take a long blogging break. Probably won't post  for a long time. Sorry. :(

Again, I am super sorry that I won't be able to post as much anymore. :( But! I will post as soon as I get more time to! I promise, but I will not post much. Even though I won't post much, I will keep this blog open so that people can still enjoy my patterns. :D

Thank you, everyone, for making this blog fun and a hobby. You all encouraged me a lot, and I had a blast posting and looking at all your sweet creations from my patterns.

Until the next post, happy crafting!

-Anna S.