Saturday, October 31, 2015

Chunky Slouchy Shrug/Sweater

Hi!
I was looking on Ravelry for the first time in two years, and I found a beautiful shrug/sweater made by Lion Brand and Stephanie from All About Ami.

I always wanted to make myself a sweater but never had the patience to make one. Quickly, I glanced at the pattern, and it is really easy and quick to make!

First, I bought 5 balls of Bernat Softee Chunky yarn in "Grey Ragg" because grey is one of my favourite colours.


Since I am super short, I did ended up using 4 balls of the grey yarn.
To make the sweater, I used my 10mm crochet hook:

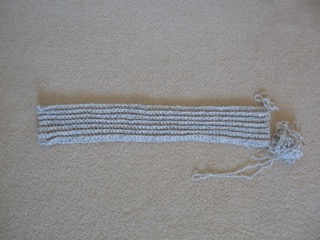
To start making the sweater, I crocheted a long chain ( I chained 65 chains). Then, I single crocheted in the back loops of every stitch.

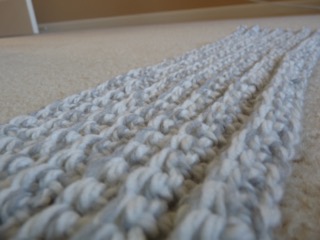
Doesn't the ribbed texture look beautiful?


After crocheting a long rectangle( the width of the rectangle was the length of my right shoulder to my left shoulder), I folded the entire piece in half. The ribbed texture should be going verticle instead of horizontal
After folding it in half, I sewed the sides only half way and left a hole at the sides. After I unfolded the sweater and added a collar, my sweater looked like this:
Tada!!

I am really happy with how this sweater turned out. This was my first time making a sweater, and it was really easy to make! I am definitely going to wear this sweater all fall and winter. :)


Happy crocheting and crafting!
~Anna

Wednesday, October 21, 2015

Desktop Favourites

Hi! I wanted to show y'all some of my desk essentials/favourites.

This is my desk...It's messy, and I hope to clean it soon. :)

The first item of mine on my desk is the black laptop(it is 7 years old and 5 pounds!). I do all of my homework, online classes, and blogging on this black brick. :P

Next are these adorable sticky notes!

Kawaii stamps

This super cool bagel shaped tape dispenser from Yoobi.


Pink scissors

And lots and lots of colourful sharpies!


That's it for today! Bye bye!

Happy crocheting and crafting!
~Anna

Saturday, October 10, 2015

Daiso Love

I recently went to Daiso with my good friend Jessica, and I got some kawaii stuff. I only got three items from Daiso, so I wanted to show you all the things I got :)

The first item I got fro Daiso is this black cat iPhone/iPod holder( as you can see in the picture, I have a pink penguin case on my iPod, and yet my iPod still fits snuggly in the holder).


The second item I got was this super cute bear measuring tape. It is a pink bear, and you can pull the measuring tape out. To wind the tape back inside of the bear, you press the mouth of the bear.


The last item I got from Daiso was this kawaii sticky pad set.I am obsessed with kawaii stationery. :P


That's it for today's post, folks! I hope you have a lovely day!

Happy crocheting and crafting. :)
~Anna

Saturday, October 3, 2015

DIY Where's Waldo Costume

Halloween is coming up. Here is a cheap and quick last-minute costume!


As a kid, I always loved the Where's Waldo books. Sometimes I would get frustrated at them because I could never find Waldo.:P
 (image found at google.com)


For Reformation Day, I wanted to be Waldo. I already had dark blue jeans, red and white striped t-shirt, brown shoes, and nerdy glasses. However, I did not have a red beanie. Since I did not want to buy a red beanie, I decided to make my own! I looked on Ravelry for some beanies but decided to make my own instead.

Using some red yarn from Red Heart, I began to make the hat:
I basically used the same pattern for my Easy Pom Pom Beanie which is from Lion Brand. Here's the link to the pattern!
I made a few adjustments and here is the new pattern I came up with:

Materials:
Red worsted weight yarn
6.00 mm crochet hook
Plastic needle

Beanie:
Ch 42
Row1: In the 3rd ch away from the hook, hdc. Hdc in every st across.
Row2- desired length: Ch2, turn, hdc in the BACK LOOPS ONLY in every st across.

BO with long tail for sewing.

Once you have your rectangle, fold it in half (Fold it so that the ribbed texture is vertical instead of horizontal)and sew the side opposite to the folded side to create a tube.


With a long strand of yarn of the same colour, thread around the top of the tube and pull tightly. If there is still a hole at the top, sew it together until the hole is closed.

Beanie done!

The beanie was quite long, so I folded the bottom up. I really like this beanie because I can either keep the bottom unfolded for the beanie to be slouchy, or I could fold it up to make it more like a standard beanie.

Here is a super easy and quick way to make a pom pom with just your hands!!
Wrap red yarn around your hand till it is super thick, tie a string in the center, and cut through the two loops.

After making the pom pom, I sewed it to the hat. Finished beanie:


Here are the other things you will need for the costume:
1. Red and white striped top
2. Dark blue jeans
3. Glasses
4. Brown/ Beige shoes


Tada! I am Waldo!


Have fun crafting and crocheting!
~Anna

This pattern is an original pattern by Anna S. from Spool of Sunshine(October 2015). Please do not claim this pattern as your own. If you wish to share this pattern, you may link to this pattern but please do not reprint it on your site. You may keep a copy for your own personal use but you may not sell or distribute it, or sell items made from this pattern.