Showing posts with label post. Show all posts

Wednesday, October 21, 2015

Desktop Favourites

Hi! I wanted to show y'all some of my desk essentials/favourites.

This is my desk...It's messy, and I hope to clean it soon. :)

The first item of mine on my desk is the black laptop(it is 7 years old and 5 pounds!). I do all of my homework, online classes, and blogging on this black brick. :P

Next are these adorable sticky notes!

Kawaii stamps

This super cool bagel shaped tape dispenser from Yoobi.


Pink scissors

And lots and lots of colourful sharpies!


That's it for today! Bye bye!

Happy crocheting and crafting!
~Anna

Saturday, December 28, 2013

Project~Easy Pom Pom Beanie

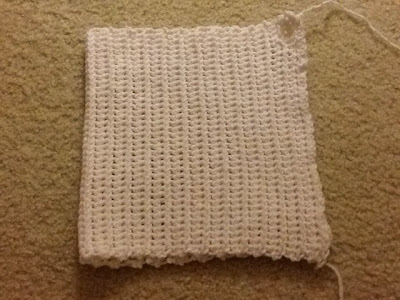
While I was watching the Wolverine with my dad and brother, I made this super cute hat!! :) I saw it on All About Ami's blog ,and I knew I HAD to make it. :)I made the long thick strip and folded it in half and sewed the side closed. I used my 6.0mm Clover Crochet hook.
Doesn't the hat have such a lovely ribbed pattern? :)
 I love the ribbed look of the hat. :) ❤️❤️


Then, I threaded a long strand of yarn around the circumference of the hat and tightly pulled the string which closed the hole. 
Then, I made a Pom Pom, sewed it to the top of the hat, and my hat was done!!!:) 
I love this hat... :) 
It looks super cute!
I wear this hat a lot. And it goes well with a LOT of my winter scarfs and jackets. :) Keep warm, y'all!!
The pattern can be found on the Lion Brand website, but you need an account to get the pattern. Luckily the registration is free!! :)

Have a great day of crocheting and crafting!! 
❤️anna❤️


Monday, November 18, 2013

Collaboration with JP Custom Kicks

 So, JP Custom Kicks customizes shoes for people, and the owner wanted to collaborate with me to make a shoe. However, he couldn't think of anything that I could crochet to put on a shoe, so instead he made these SUPER cute Totoro Toms shoes, and I will make a plush Totoro that will come with the shoe if you purchase it. I received this pair of shoes on Sunday and when I saw them, I thought they were fantastic!
These shoes are so cute! :) They were cleverly made too. 
And instead of the back tag saying Toms, it says Totoro instead! So clever! 

I am currently still making the Totoro, but it will be done very soon. All of the credit goes to JP Custom Kicks for making the whole shoe. Here is his Instagram where you can see all of the shoes he customized: instagram.com/jpcustomkicks.  


Have a wonderful day of crocheting and crafting! 
~Anna~

Wednesday, November 6, 2013

Sweet Heart

Isn't this such a cute heart? :) I got the pattern from Ravelry and downloaded the pattern onto my iPad. The Ravelry pattern can be found here: http://www.ravelry.com/patterns/library/crochet-heart-motif-1.

The heart turned out bigger than I expected since i used a D hook. I ❤️ Clover hooks!!

Here are the supplies I used. I crocheted the heart with Loops and Threads Impeccable Solids in Arbor Rose and a D Clover Crochet Hook.
That's all for today!

Have a wonderful day of Crafting and Crocheting!! 
❤️anna❤️

Friday, September 27, 2013

DIY Card Tutorial

Well, I have been crafting for 2 months now, and I am liking it a lot( sorta...)! But aside from crafting, I also love to knit and crochet ( You all probably know that by now... :P). I thought to myself, " Why not  mix crafting and crocheting together?"
 As the solution, I made a card with crocheted hearts on it, and I decided to post a tutorial.(YAY!)

Materials
~2 different types of scrap book paper or construction paper
~ Scissors
~ Glue
~Glue gun
~Yarn and hook (for heart on card.)
~Hole Puncher
~Sharpie or Pen.

          ~Step 1~ With scissors, cute out a neat rectangle from one of the different types of scrapbook paper.
          ~Step 2~ With hole puncher, punch out 2 holes about 1 inch apart from each other in the center of the paper.
          ~Step 3~ With yarn, cut a long strand of yarn and thread it through both holes multiple times until there are two strands 1 inch long hanging out of the holes.
         ~Step 4~ Tie a bow with the 2 hanging strands of yarn.
         ~Step 5~ With the other type of scrapbook paper, cut a long strip of paper that is long enough to wrap around the sides of the rectangle that you cut out from the other type of construction paper.
         ~Step 6~ With the glue, glue part of the strip onto the middle of the rectangle card and glue and fold the sticking out ends around the rectangular card.
         ~Step 7~ Let it dry
         ~Step 8~ Crochet a heart with yarn and hook with this pattern.
         ~Step 9~ With the glue gun, glue the heart onto the center of the strip of scrapbook paper on the card.
         ~Step 10~ With the sharpie or pen, write one of the person's name on one side beside the heart and write the other person's name on the other side beside the heart on the card.( OR if you are making the card for one person, you can write the person's first name on the left side beside the heart, and write their last name of the right side beside the heart. )
       

And voila! You are done! I hope you enjoyed this post. As a wedding gift for the couple, I made them some of my teddy bear keychains!


I also hope that you have a wonderful day of crocheting and crafting!
~Anna~